Tuning key

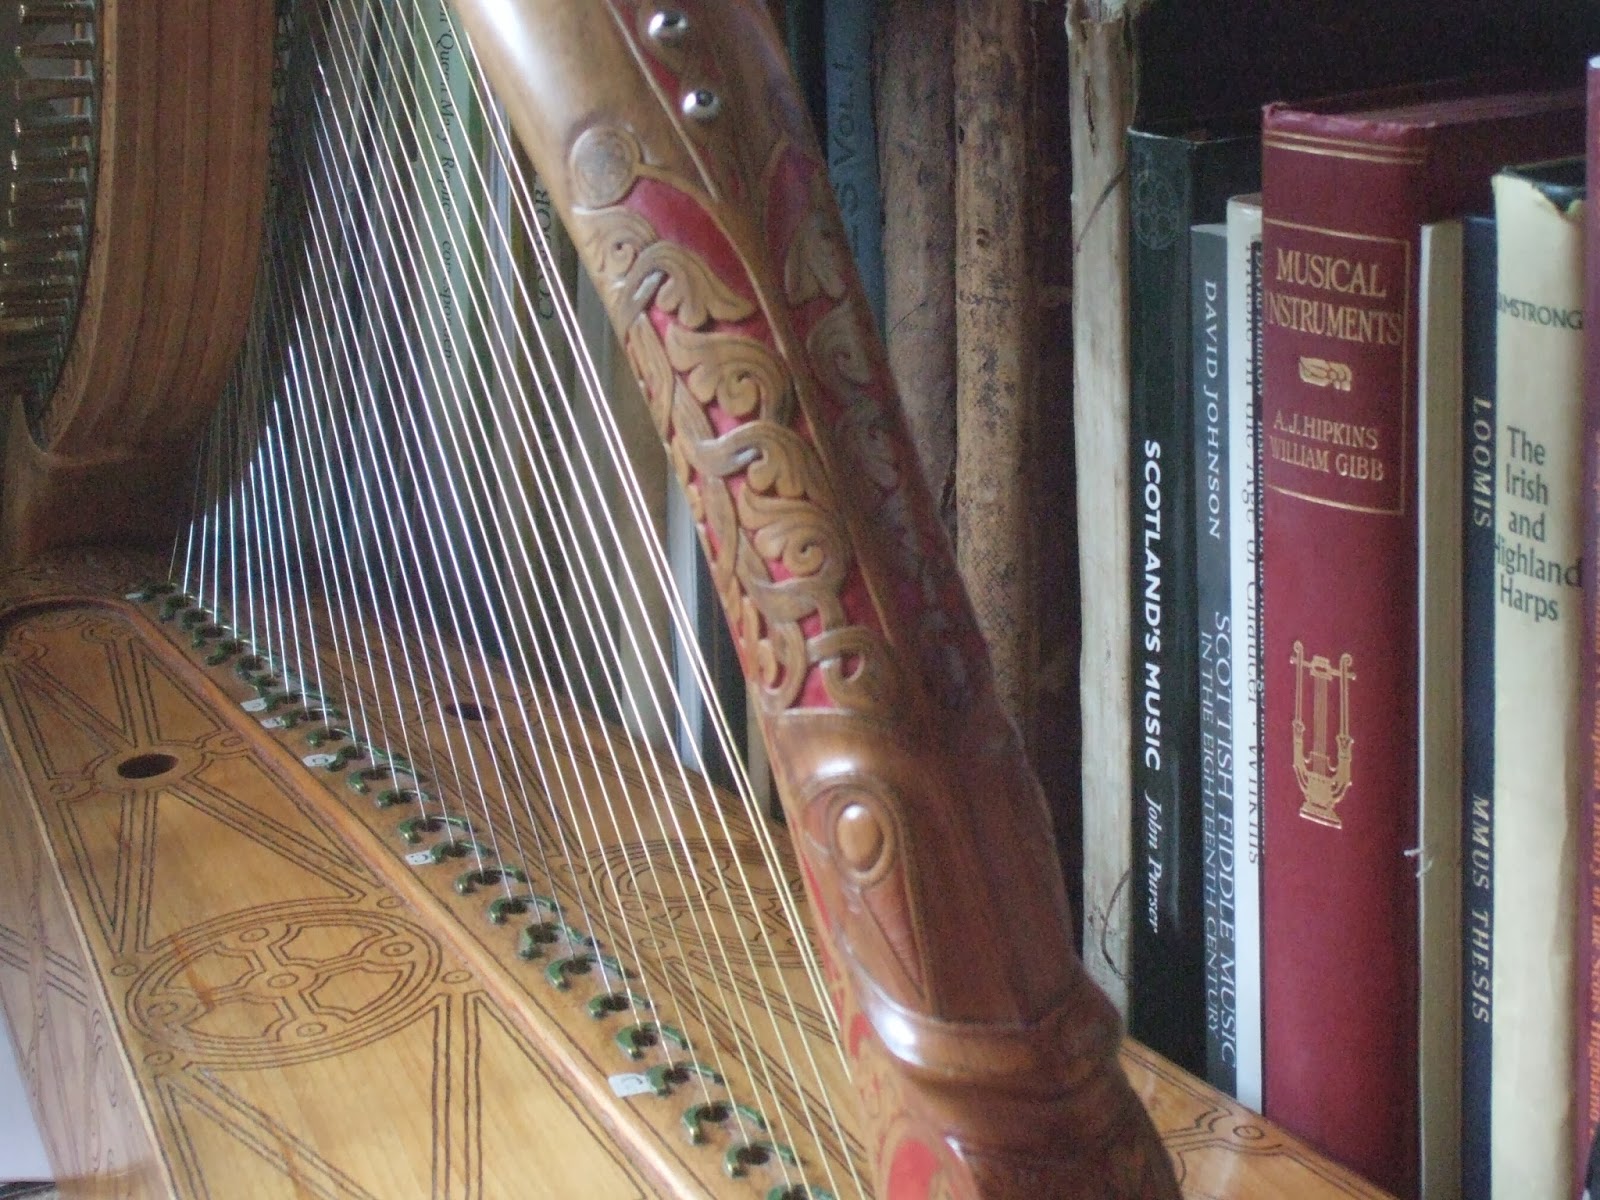
I lost my tuning key in Edinburgh last weekend. At first I was rather irritated; the replica Queen Mary clarsach has handmade tuning key drives, copying the original, which are rectangular rather than the usual square. So the key is also custom-made with a rectangular socket, and also has a second socket in the end of the handle to fit the square drive of the 30th pin. Basically it is useless to anyone else! I did have a rather ill-fitting spare with me

However after a while I realised this was a great opportunity. I made this key not too long after the harp was new, and while it was comfortable to use with itsĀ  roundwood quince handle from the garden here, the rectangular socket was always a bit oversized and was loose on all the pins. Also it was rather “rustic” in appearance.

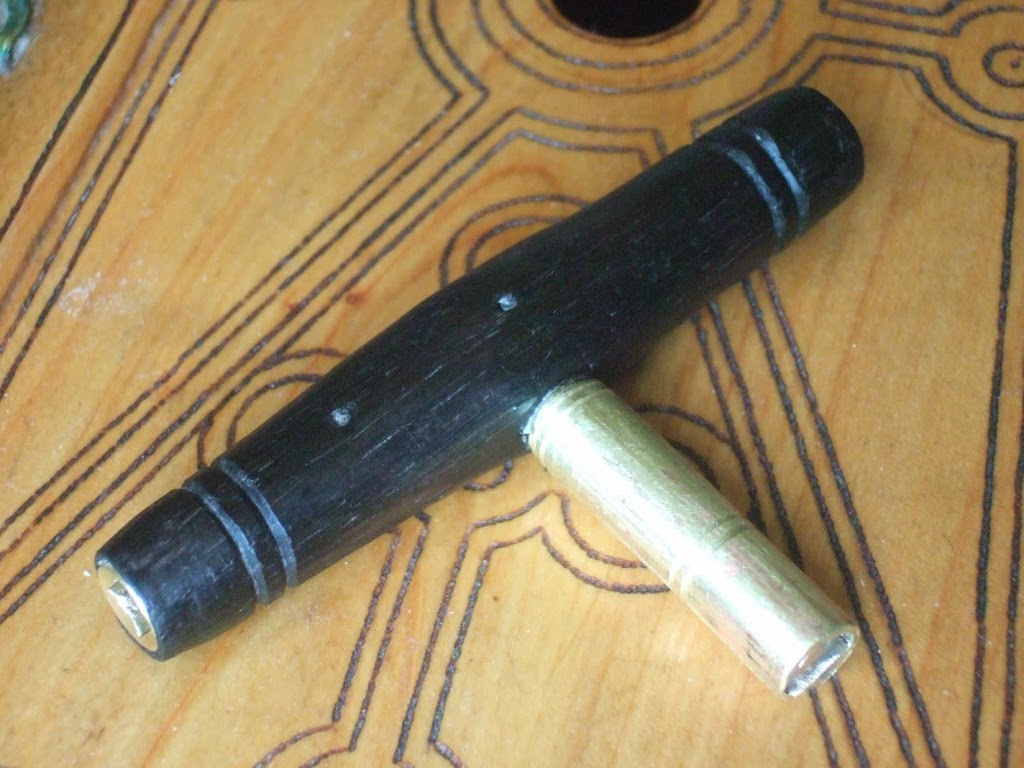
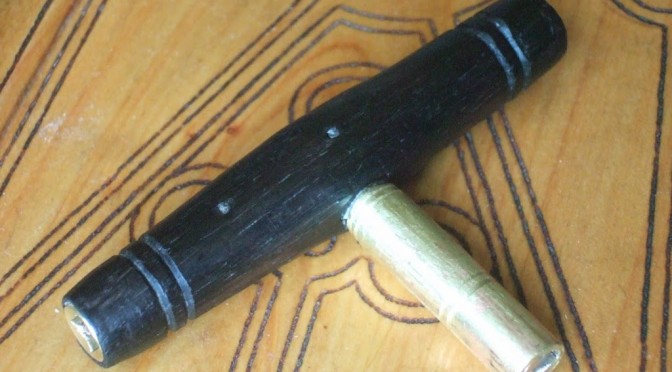
So today I made a new key for the Queen Mary harp. This one builds on my experience making the first. The design is the same – a T shaped pin, with a brass socket made from a rod soldered inside a tube, the end of the rod slit with saw and files to fit the drives. The second socket, from a large clock key, fits in the end of the handle. Both sockets are fixed in with little brass pins running through the wood, and secured with glue to stop them shifting.

For the handle of this key I used a piece of ancient Irish bog oak which Davy Patton gave me years ago. I had thought of carving medieval West Highland designs into it, and even gilding the designs, but as the handle took shape it became very spare and elegant. The bog oak does not carve very cleanly anyway. So in the end the only decoration was a pair of parallel incised bands at each end of the handle and each end of the main socket shaft, echoing the pairs of incised bands on the Queen Mary harp tuning pins.

I have to make another soon as my student who has the Student Downhill harp has lost the key for it. It ought to have a brass socketed key anyway as the commercial steel-socketed key it used to have was starting to chew up the decorated brass pins I have started fitting to it. Which reminds me, I need to finish the set of brass pins for that harp. So many jobs lining up…

Silver harp strings

At the beginning of January I was fiddling with the setup of my harp, as part of an ill-fated New Years Resolution to change its tuning. For the last two months I have had 10 gold, 10 silver and 10 brass strings on (nominally), which I liked because of the neatness and symmetry of the counting.

Taking the silver 3 notes higher than it ever used to be, up to an octave above middle c, must have emboldened me. The silver I am using now, and the way I am drawing it hard, seems to work very well for thinner higher pitched strings.

Also I have been pondering the Ouseley quote about the silver strings on the Trinity College harp.

So the latest scheme (pictured below) takes the silver right up to the top of the harp. The only exception is the very highest string which still has Dan Tokar’s experimental super-hard-drawn gold wire from years back. I just can’t bring myself to remove it!

The sound of the high silver is nice, more creamy and fluid that the brass. I think I always felt that the high strings on this harp were a bit pingy; I swayed between thinking that the treble end of the soundbox is too thick, or thinking that it is meant to be pingy as a contrast with the singing midrange and the roaring bass, or thinking that if I could only get the right type of brass (red brass, yellow brass, hard-drawn, latten…) then it would become perfect.

Now I will watch how these high silver strings hold up for a couple of weeks. If they behave themselves then I’ll probably keep them going for a while.


Harp string labels

Recently I wrote a new page on earlygaelicharp.info, about possible inscriptions on the Queen Mary harp. As part of this I reviewed my photographs of the labels glued on the harp labelling some of the strings, and then I had the idea of photoshopping and cleaning up the photos, scaling them, printing them out and glueing them onto my replica in the appropriate positions.

For those of you with a Queen Mary replica who want to join in the fun, here is the image I ended up with. Print it out at 486dpi onto good old fashioned white or off-white laid paper, cut out along the black edges, and stick on using flour and water paste. The numbers go on the right hand side* of the string band (so they are visible for a left orientation player), and they are upside-down when the harp is in playing position, so the player can read the letters. They go in order, counting from the treble: 1 [illegible], 8 [c], 9 [b], 11 [G], 15 [C], 22 [C].

Any problems or questions let me know! If you send in a photo of your harp with the labels stuck on, I will feature it here!

*Right and left hand side of the harp are described as from the viewpoint of the player, not of an onlooker