I have been thinking for a few years now about the shape of the inside of my harp, in light of the new information we have from Karen Loomis’s PhD research at the University of Edinburgh.
When I commissioned the harp from Davy Patton in 2006-7, the thing we were most lacking was info about the inside – the shapes of the joints, and the profile and thickness of the soundbox. Basically, we had to make a lot of educated guesses.
Since then, we have the CT-scans and other technical studies of the Queen Mary harp that Karen has been working on, and many of our guesses have turned out to be pleasingly correct, such as our choice of timber – willow for the soundbox, and a bent limb for the pillar – but we were quite wrong in our decisions on how to shape the soundbox interior.
Luckily, we had erred very much on the side of leaving the wood too thick, so last week I took the harp to Natalie Surina, of Ériú Harps in Oughterard, Connemara, for her to cut a lot of wood from inside the soundbox.
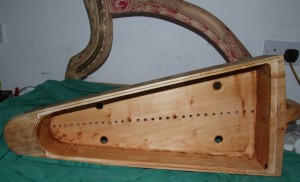
There were three main things that I wanted addressed. First, Davy had cut the soundbox straight back just above the top string hole. On the original Queen Mary harp, there is a kind of barrel-vaulted air space giving a lot more space and a lot less solid wood at the top end of the soundbox. Secondly, we had no idea that the neck-soundbox mortices on the old harps usually went right through, breaking smoothly out into the interior of the soundbox, so Davy made the neck mortice blind, with solid wood seperating the mortice from the soundbox interior. And thirdly, we did not have information about the soundboard profile, just a general indication of its thickness. Karen made a detailed contour map of the soundboard thickness (published in her Galpin Society Journal article), showing how the thickess varied not only from top to bottom, but also from one side to the other.
Also, Davy took care to smooth the soundboard interior to a fine, flat finish. Mike Parker had mentioned seeing tool marks inside, and when I was looking at the scans with Karen quite early on I asked if she could generate a surface rendering of the soundbox interior, and we discovered that it is like a ploughed field, with long carefully angled gouge marks all over. Subsequently Karen had the back of the Queen Mary harp removed, confirming by visual inspection the nature of these distinctive tool marks.
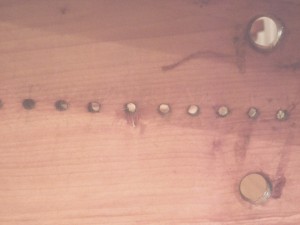
When I arrived at Natalie’s on Monday evening, I took the tension off the harp, removed the back panel, and then removed and bagged all of the strings. It was interesting to see inside the harp – I had last had it open in 2007. There were marks from where the wooden toggles had pressed into the soft willow. I also had to remove the lowest 6 pins, which go through the neck and also through the pillar tenon.
On Tuesday, Natalie pulled the harp apart, and then we looked at the inside of the box and also looked at some images and 3-D renderings that Karen had prepared showing the shape of the inside of the treble end.
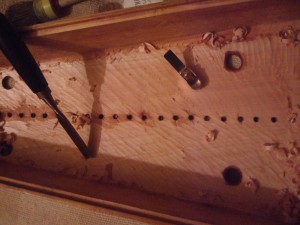
Cutting through the mortice, and undercutting the treble end of the box, proved uncomplicated. The tool marks were a little more interesting. Natalie noted that it was difficult using a gouge to make the lateral grooves – she wondered if the medieval craftsperson had used a gouge with a very short handle, but she also found that a finger-plane produced very similar gouges and was much easier to manipulate inside the box.
Wednesday saw the completion of the thinning of the soundbox. I had suggested to Natalie that the grooves were running at too steep an angle, so for the final thicknessing she turned them slightly more across the box – but we realised that they have a functional purpose as well as an acoustic purpose, as they run at a certain angle across the grain for ease of cutting. Because the grain on my box is parallel to the long side, not as on the original to the centre line, this made the grooves too square on to the grain, making the cutting more difficult.
One of the reasons I chose Natalie to do this work is that as well as being the harp maker who has made the most use of Karen’s research, she also makes a point of carefully tap-tuning the soundboard of all of her instruments. She said after we had finished that she had perhaps not shaved quite enough off – but I was happy with that, on the basis that we can always go back and take more off, but you can’t ever put more on!
Davy had sealed the soundbox with linseed oil and beeswax. I had polished and tended this finish on the outside over the course of 6 months or so, but we felt that this had not been so successful on the inside because I had not been able to access it – and so the finish was rather thick. Natalie wondered if the opposite approach might work, thinking of the egg white traditionally used to finish lute soundboards. We found a piece of sanded willow as a test piece, and cracked a local farm egg, whisking the white and painting it on. A second coat confirmed that this was going to work very nicely, so Natalie egged the inside of the soundbox before lunchtime, and a second application after lunch.
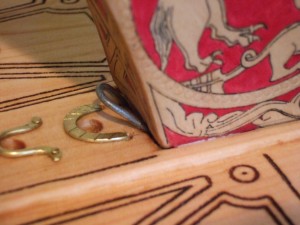
When the harp was being made, I asked Davy to add the 30th iron tuning pin in the bass, off the cheek band, and also to add the iron staple on the soundbox, in the angle between box and pillar. Many people were sceptical of the utility of this staple, but I wanted the replica to be as accurate as possible in as many ways as possible.
I originally strung the harp with 29 strings, as I could not think of a sensible way to attach the 30th string to the loop. My postcard I still use shows the harp with only 29. It was Ann Heymann who suggested a method of running the 30th string through the loop and then down into the 29th string hole.
Davy made the loop with its legs bent, so that it is inserted into two holes drilled perpendicular to the soundbox front. However Karen’s study of the scans showed that actually the staple was straight, and the holes were angled. She also measured the staple as being just a bit thicker than the one Davy made. So, I had prepared a replacement staple, forged from a piece of antique iron, and while the egg was drying Natalie drilled two new holes for it, and gingerly tapped it into place.
My final task before re-assembling the harp was to file the heads of four of the pins I had removed. When I originally made the pins in 2007, I filed their flats to make them rectangular, but I had not filed the sides, so they were all a bit wide. Over the years, as I have replaced strings, I have pulled the pins and filed the sides, but these bass pins either had never had their gold strings removed, or had been stuck fast in the neck by the tension of the harp and the way the pins went through the pillar tenon. 3 of the gold strings were still on the harp, having never been detensioned since being installed in 2007, and two of the silvers are also original to 2007 although these had been unwound at some point for their pins to be removed and filed.

There was a slight bit of side-to-side play in the neck-soundbox joint, so I went outside and found some dry grass, to stuff down the sides of the joint (Tim Hobrough spotted the grass stuffed into the Lamont harp’s neck joint back in the 1980s). Then I re-inserted the pins, unbagged and re-threaded the strings, replacing a couple of toggles and replacing two strings that had snapped in removing them. Then the back went back on and I brought the harp up to tension.
I have not yet swapped the gold basses back on; that is a task for today or tomorrow. I’ll wait a day or so for the strings to settle in and then I’ll make the “after” youtube so we can compare the sound before and after the work. My first impression, given the very tubby silver basses, is that the sound of the harp is much improved, yet still recognisably the same harp – it speaks with the same voice but much freer and more singing.
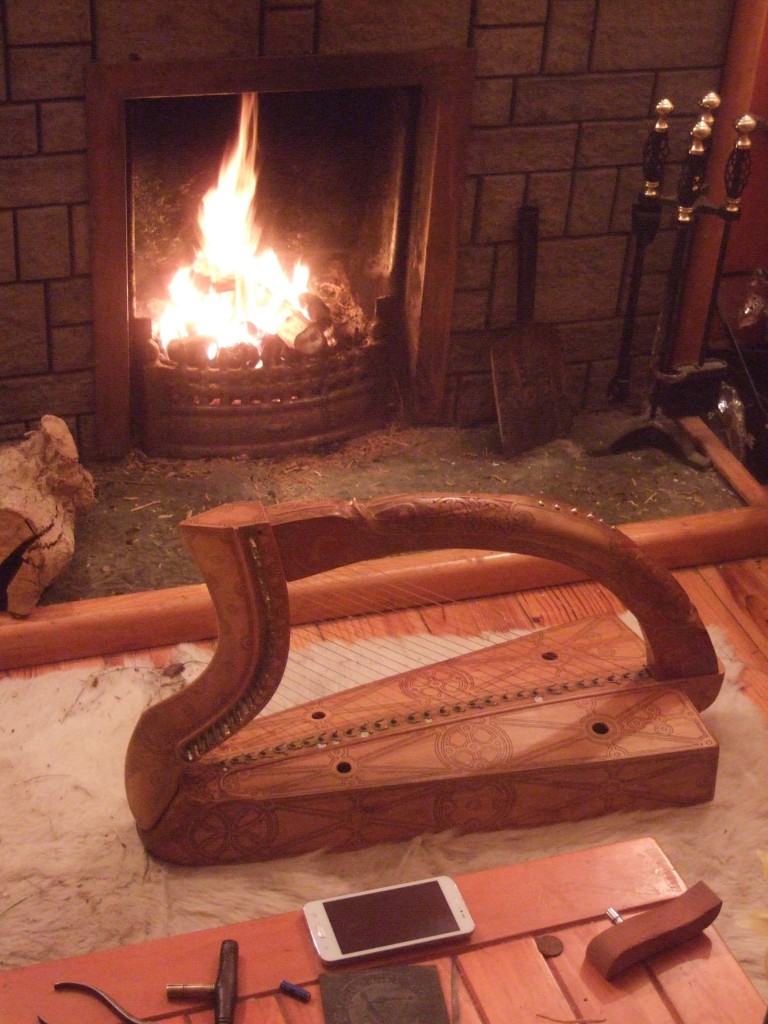
Thanks to Natalie Surina, for taking on this demanding task and for putting up with my obsessive instructions; to Karen Loomis for all her research and for her very useful comments and information for this project; to Davy Patton for having made the replica harp well enough 8 years ago that it can withstand the onslaught of new information about the originals; and to Sylvia Crawford for moral support!

Thank you so much for sharing the step by step progress of this restoration. It was a great read! I have not listened to the sound clips yet but I will.
THANK YOU SO MUCH ! I am trying to build a harp and seeing the inside really helped me understand it better.