This post describes my method of making tuning pins. It is a labour-intensive process and though I am taking orders for sets of pins, I think my pricing does not really cover the work involved. But I want there to be more harps with beautiful handmade pins! I’m posting this so that if anyone else wants to take on the manufacture and supply of pins like this, they can get some ideas from what I have worked out.
Design
I want my pins to be the same as the old Irish harp pins. This is harder than it sounds because it is very difficult to accurately measure the old pins. I have been studying a combination of photographs of the old pins, and accurately calibrated laser-scans. The problem with the laser-scans is that there are a lot of scanning artefacts on the tuning pins; the problem with photographs is that perspective and parallax makes the tapers and exact sizes very difficult to assess.
For the reconstruction copy of the NMI Carolan harp, I chose one of the pins and made a paper template full-size from the laser-scan. I am also interested in copying some of the archaeological pins such as the ones from Montgomery Castle. It is also possible to come up with a kind of generic design pin that is not an exact copy of any one old pin, but which fits into the general scheme.

I also tried making resin casts of the Monaghan pin, but this is not a particularly good pin since the shaft is not parallel and circular. Even then it was very hard to accurately measure its size.
I think that for functioning pins we need to control the taper and diameter of the shaft, and we need to control the taper and width of the drive. I am doing this by using commercial standard tapered shafts, and then hand-shaping the heads to fit with standard sized gauges.
Shafts
I’ve been using Dan Speer‘s brass shafts. I haven’t yet found a supplier in the EU; but Dan is efficient and friendly to deal with. I also ask Dan to drill the string hole for me. I ask him to make the hole a bit smaller than usual, and closer to the end. The blanks are expensive, and so is shipping and import duty.
I have been experimenting with different size blanks. They are sized according to the Imperial taper system, with a 1/48 taper. The blanks are specified by a length and a number; the number refers to the diameter of the large end of the pin. This means that the longer the pin, the smaller the small end is. Sometimes I cut the wide end of the head off to make the blank shorter; this of course makes the whole pin more slender than if I had used a shorter pin of the same number.

Heads
For the heads, I buy square-section brass rod. This is available in standard sizes. The rod needs to be at least as wide as the wide end of the shaft; so for no.4 shafts I would buy 1/4″ (6.4mm) square rod. If I am using no.5 pins, then I need to get the next size up which is typically 3/8″ (9.5mm). Ideally the rod should be about the same size, so for no.5 pins the rod should be 7.5mm, because anything bigger than that will just need filed away.
Assembling heads and shafts
The head is cut from the square rod with a hacksaw. For consistency, I use a caliper / divider to mark the length of the head.
The shaft can be used as is, or can be cut down. I started making my pins using the blanks as is, and then I realised that this made my pins a bit thicker than modern machined harp pins of the same nominal size. That’s because I was adding the head to the wide end of my pin, whereas a modern machine-made pin cuts the head down into the wide end of the blank. So, my preference now is to cut a short length off of the wide end of the pin.

In the example from my notebook, I would cut the head from 1/4″ square brass rod, cutting a piece 18mm long. I would take a pin blank, #4 x 3 1/2″ (i.e. no.4 x 89mm). I would mark 75mm from the small end, and cut off the remainder of the fat end.
Then I would carefully file the cut ends flat, so that they would fit together closely.
I use a blowtorch and silver-solder to join the shaft and the drive. This is tricky and precision work. I use firebricks to hold the pieces together under their own weight, standing the shaft wide-end-down on top of the head, with just a nice amount of flux powder. When they are almost red-hot the solder can be touched to the joint to melt in, and then more heating will bring the brass to red-hot and the solder will flow throughout the join and make nice wide fillets at the four corners of the head.


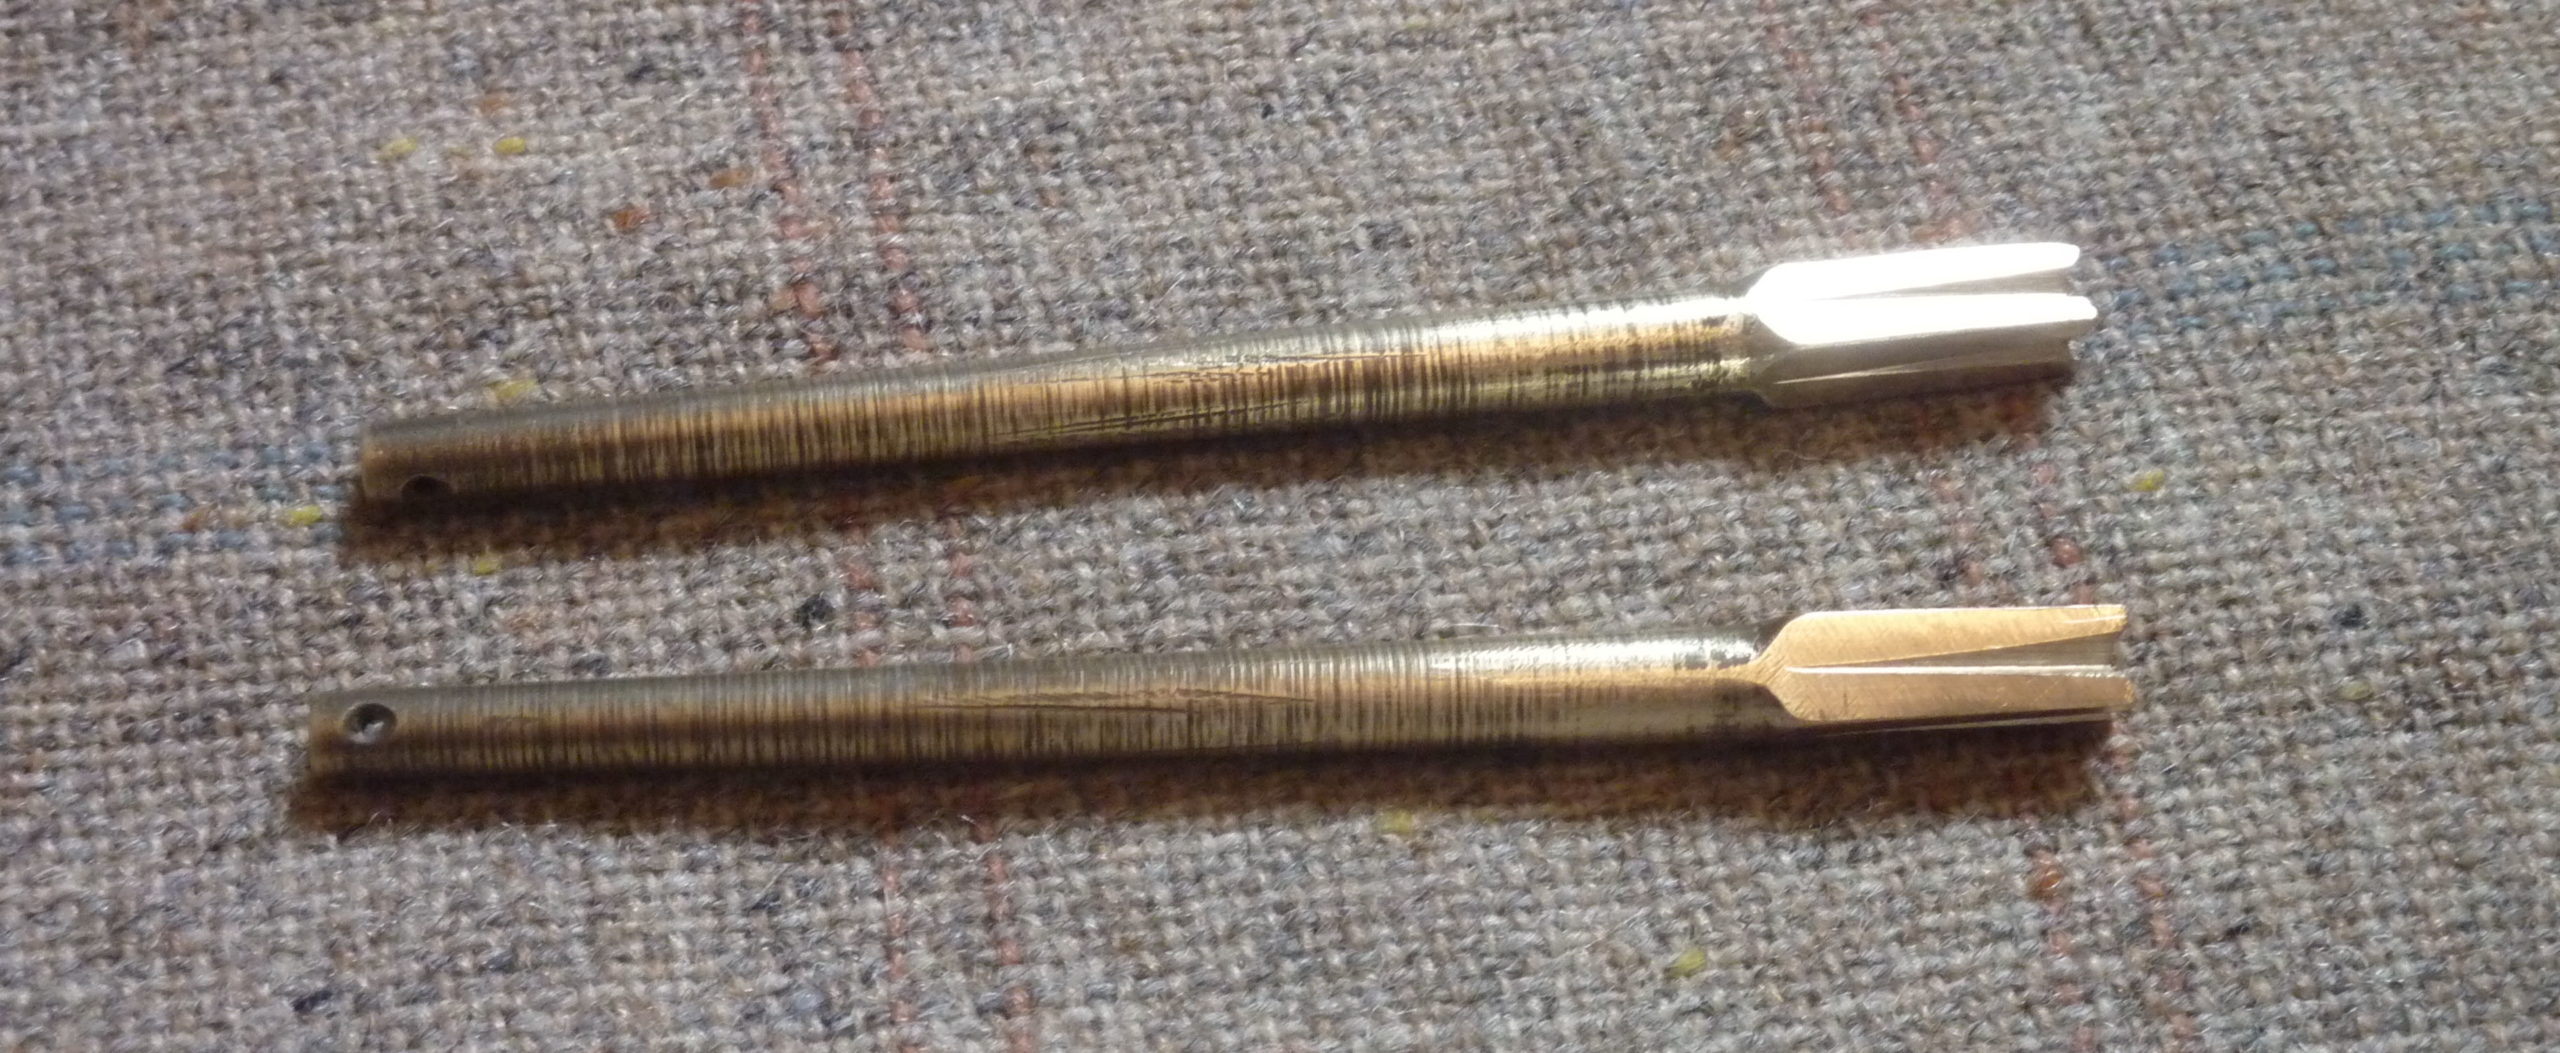
Then the heads are filed. Care is needed to make the inner, wider end of the head just flush with the shaft; the outer, narrower end is tapered gradually down.
I use standard clock-keys as measuring gauges to judge the taper of the heads; for the example no.4 pins my notebook indicates how far onto the tapered head two clock keys will fit; a no.13 (5.5mm) key will fit about halfway down the drive, and a no.12 (5.25mm) key will fit just a few mm down the end of the head. I think I would use a 5.75mm socket on a tuning key for these pins.

Finally, the V-shaped grooves on the drive are made, with fine needle files. Different original pins have different configurations of these decorative grooves; their specific shape and depth gives a lot of the character to the pins. For these no.4 pins I made the grooves on the drive faces very deep and tapering; the diamonds on the drive ends were also cut very deep and then shaped to give a “clove” effect. Other pins I have made have much shallower grooves which give a more two-dimensional look, more like engraved lines. Some pins also have lateral incised lines running around the drive end.
I don’t believe this is how the old craftsmen made brass tuning pins. I think it is much more likely that the old pins were cast and/or turned on a lathe. I have seen modern cast and turned copies of the old pins, and they look very nice. But I don’t have either foundry equipment, nor a lathe. Also it seemed important to me to fit in with modern norms and to use the modern 1/48 Imperial taper shafts, just like other harps.
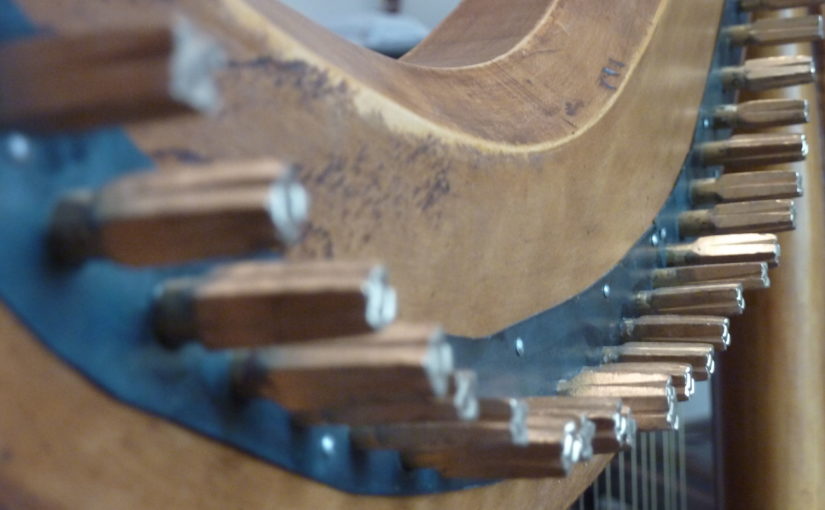
My header image shows the pins I made for the reconstruction copy of the NMI Carolan harp, which was made for me by Pedro Ferreira.
I made a film showing my complete process from start to finish for one pin:
https://www.youtube.com/watch?v=V8wOhX5YXT4
I have now commissioned turned solid blanks which removes the need for soldering when making #4 pins. See my pins page for more information.
I have documented the making of a set of pins using the new blanks:
https://simonchadwick.net/2022/01/making-a-set-of-pins.html